Home Sweet Home Quilt Along
- Schedule
- Block 1 - My Home
- Block 2 - Lapacek's Orchard
- Block 3 - House by the Bay
- Block 4 - My Tilted House
- Block 5 - Two Trees
- Block 6 - Tree of Life
- Block 7 - Under the Moreton Bay Fig
- Block 8 - A Wonky Modern House
- Block 9 - Scrappy Trees
- Block 10 - A Home for the Birds
- Block 11 - The Happy Tree
- Block 12 - the little house
- Block 13 - Three Trees
- Block 14 - Under the Apple Tree
- Block 15 - A Home for Hoot
- Block 16 - Branch Sweet Branch
- BONUS - accuquilt home
- BONUS - Acid Cottage
- BONUS - Marcia's Crazee Patch House
- BONUS Block - Rippling Pond
- Flickr Group - Post your blocks here!
- BONUS - Acid Cottage
Project QUILTING
Feedback & Features
My Fabric is For Sale!
Kim's Crafty Apple
the Apple
Labels
My Flickr Stream!
My Blog List
-
49 Unique DIY Valentines Gift Ideas4 hours ago
-
-
Catch Up (2nd half of 2025)3 days ago
-
2026 Crafty Goals3 weeks ago
-
2nd Annual Garver Pumpkin Party2 years ago
-
End of blog3 years ago
-
-
A Japanese Stash Buster Quilt6 years ago
-
Quilted Tassel Pouch Tutorial6 years ago
-
H2H Quilt Challenge 20196 years ago
-
Shuffling6 years ago
-
Quiltsy Cares 3/31/196 years ago
-
Eco-living On A Budget6 years ago
-
a new day dawns7 years ago
-
-
-
-
-
Hand Maker Blog Tour9 years ago
-
-
The San Salvador Sails By ...9 years ago
-
-
Gift of love9 years ago
-
-
New Updates Coming Soon10 years ago
-
Sweet Jenny Belle10 years ago
-
-
-
Winning Treasury #22011 years ago
-
Dianabol11 years ago
-
Dandelions11 years ago
-
A Quilty Finish12 years ago
-
A walk in the snow13 years ago
-
-
the harvest begins~13 years ago
-
-
My Blog Has Moved!13 years ago
-
Polka Dotted Dress Envy13 years ago
-
Come visit our new blog!13 years ago
-
Handmade Christmas Recap 214 years ago
-
-
Blech18 years ago
-
-
-
-
-
-
-
-
Favorite Websites
Kim's Crafty Apple has MOVED to www.PersimonDreams.com
I’m re-branding myself from Kim’s Crafty Apple into ‘Persimon Dreams.’
You can now find me at:
www.facebook.com/PersimonDreams
www.twitter.com/PersimonDreams
www.pinterest.com/PersimonDreams
(and my jewelry is still at www.theapple.etsy.com)
Where Have I Been?
Well – I made a big decision. I’m re-branding myself from Kim’s Crafty Apple into ‘Persimon Dreams.’ I’ve been contemplating this for quite awhile now and a few things that have happened recently encouraged me to make the move – and it’s done!
You can now find me at:
www.facebook.com/PersimonDreams
www.twitter.com/PersimonDreams
www.pinterest.com/PersimonDreams
(and my jewelry is still at www.theapple.etsy.com)
I still have a bit of work to do on fixing my links and things – there’s a wordpress plug in I plan on trying…but I’ll admit – I’m sort of nervous about it…! I’ve learned quite a bit about website design in this process but I still have a lot to learn!
Thanks to everyone for supporting me during this move! I promise – you won’t be disappointed with it!
Patriotic FUN!
If anyone reads this that is from Wisconsin I am sure you are well aware that you need to get out and Vote in today’s recall election. I’m not going to write about my political views on here but I am going to say this – if you don’t vote, you can’t complain about what’s going on.
To start our morning off we’re heading to Cedi’s 4K picnic. I had to sign up for a dish to pass a few weeks ago. I always have a difficult time deciding what to make because I never know what I’m going to feel like making until I’m actually making it. (sort of like my art projects). I finally wrote down Patriotic Strawberries (worked out well that the recall election was on the same day as the picnic) and was going to make these:
Source: allrecipes.com via Kim on Pinterest
Strawberries were ready early in Wisconsin so this plan ended up working really well.

So, this morning I melted my white chocolate, put my blue sprinkles in a bowl and made up some Patriotic Strawberries!
I also couldn’t resist and made a Patriotic Jello Dish to go with it… (Blue Jellow, whipped cream, and yes, Strawberries).
I’ll be working at my poll location this afternoon so I’ll see you all when the polls are closed!
Monday Update – BOM and QAL’s, Body Step, Weight Watchers, Long Arm Quilting, and Judy Martin
Happy Monday everyone! I am just back from doing BodyStep at the gym this morning. I’m a WeightWatcher and there running a new ‘Live Life Active’ campaign. Working out hasn’t really been an issue for me – I really do enjoy it but this new campaign has relit the fire in me and I’ve made a huge point to make sure I get to the gym. Last week I earned 63 activity points! I’m pretty excited about that. Anyway – we’ll see if it makes a difference in my weight loss this week…I’m guessing it won’t this week, but next week should be huge.
Anyway – I’m also super excited about this afternoon! A lady is coming to help teach me how to work through my issues with my long arm quilting machine! I can’t wait to really feel comfortable with it and know what to do when certain problems arise - like stitches skipping and needles breaking. It’s been hard to work through them when I only get a few minutes at a time down there. My mother-in-law is taking my kids for the afternoon so I can really focus on my machine!
And then – to top off the cake for today (or I should say Strawberry Banana Cream Pie since I’m making that for dessert tonight) – Judy Martin is coming to my quilt guild to talk! SUPER Excited!
Now let’s take a quick peak at my quilt along progress:
2012 8-inch Sampler Quilt from all different Quilt Along’s, Block’s of the Months, and my Own Ideas! – 35 blocks made!
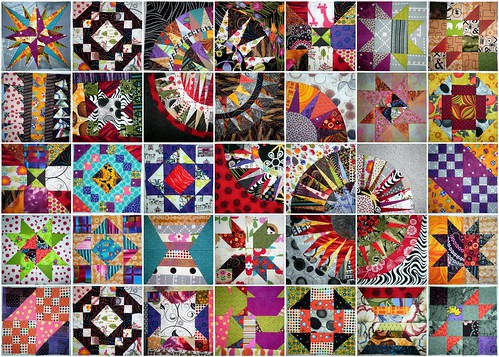
Can you find the two ‘Spinning Nine’ Blocks I made for my quilt?
I have two of every block made for the Blogger’s BOM ! I’m still really enjoying the fun!
I finished the 10 blocks from the New York Beauty Quilt Along! I was definitely getting the hang of these by the end BUT I definitely think I’m going to keep at just 1 each for this quilt – but boy – do I LOVE them!
I still only have the sole Mariner’s Compass Block done from the aid of Chris Lynn Kirsch’s class and her new self-published book, Compass Capers. I will definitely be making at least one more of these for this piece – in fact it’s on my
I did a really fun ‘star’ block from the Crumb Along. It is such a fabulous way to make a quilt! I may have to make more than two of each of these…we’ll see what happens…
I have plan to put my own personal ‘tweak’ onto the blocks from the ‘Beginner’s Quilt Along’ that’s starting up soon over at the Quilting Gallery.
I’m up to 35 8-inch blocks made and I am so so so LOVING this quilt!
You can see what everyone else’s blocks for the Quilter’s BOM look like in the flickr group:
http://www.flickr.com/groups/bloggersbom/pool/with/6789066490/
and for the New York Beauty Quilt Along in this flickr group:
http://www.flickr.com/groups/1900096@N20/
and for the Crumb Along: http://www.flickr.com/groups/1722689@N25/
FabricFascination
Next up: the BOM from FabricFascination. Sometime’s BOM’s are nice to just have the fabric all sent already precut for you – and that’s exactly what I’m doing with this one. I have my June block all finished up but I’m going to make you wait to see it until Kym blogs about her’s over at Fabric Fascination!. She showed off the baby quilt she made from the April Block here and then Amy Schimler featured it on her blog too!
- Overview of the Block of the Month Club
- Block of the Month Pre-Cut Kits
- Block 1:
- Block 2:
- Block 3
- Block 4
- Block 5
The Craftsy Block of the Month
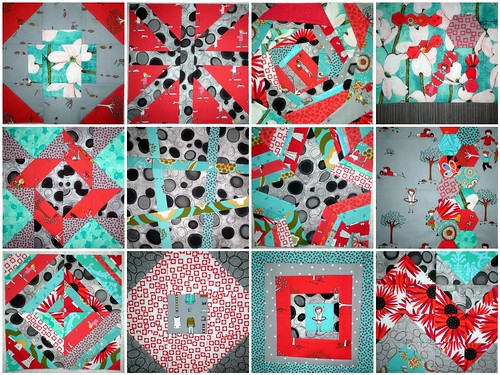
I now have 12 blocks made for the Craftsy Bock of the Month! June was a ‘Modern Nine Patch’ and we made an Octagon and a Greek Cross. They were easy peasy this month which just makes my wait longer for next months blocks! oh – well! I am still loving this red/turquoise/grey color scheme for this quilt – I think it’s going to be pretty spectacular in the end!
And here’s the Craftsy Block of the Month Flickr Group if you want to see what others’ looks like:
http://www.flickr.com/groups/craftsyblockofthemonth/
I’ll try to post soon about my adventures with the long arm today and how the talk went with Judy Martin – so excited!
Celebration Quilt – the Last Round and Quilt Top Reveal
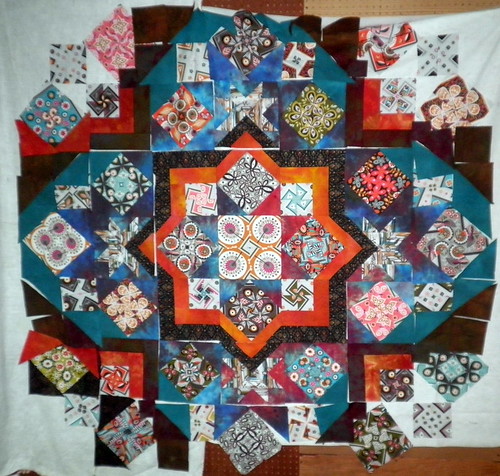 I had the center medallion created and the second round finished – it is time for the last round! Before I got into picking the colors for the final round I had to make some more Kaleidoscopes. I’m going to have to incorporate these into quilts more often – I love how much a fabric design can change with just a simple turn of a print!
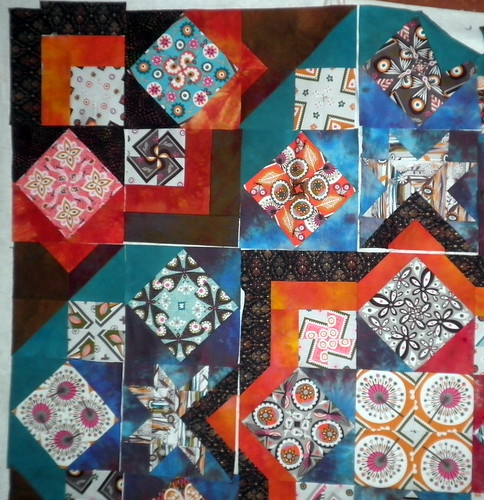 Most of the colors for the final round were already determined by the choices I made in the second round. Of course – I rand out of some of the hand-dye I had used earlier (outside of the turquoise) and I found a similar piece that wasn’t exact but does work pretty nicely to finish the design out. Anyway – my final ‘big’ decision was what fabric to use on the outer corners – the same black gold print used in the inner star (above) OR
 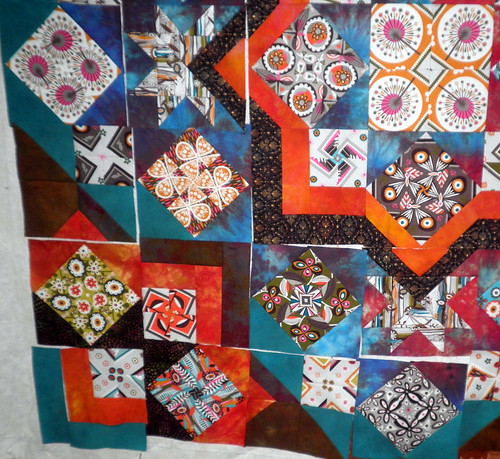 The turquoise fabric?
 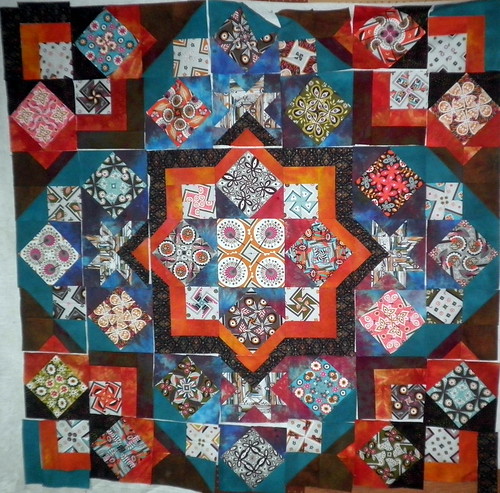 I felt that they both looked good but the black print made me feel like it ended the quilt more than the turquoise did and since I don’t have any intentions of putting a border on it I decided to go with…
 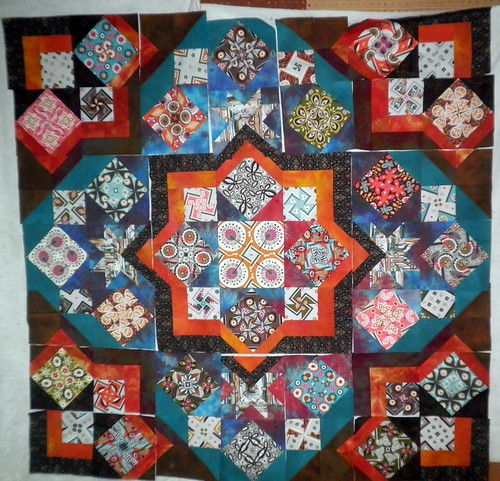 The black print! Now that I have all my fabrics picked out I pieced all of my blocks together. Can you believe it? It’s time to piece this top! I just love this part!
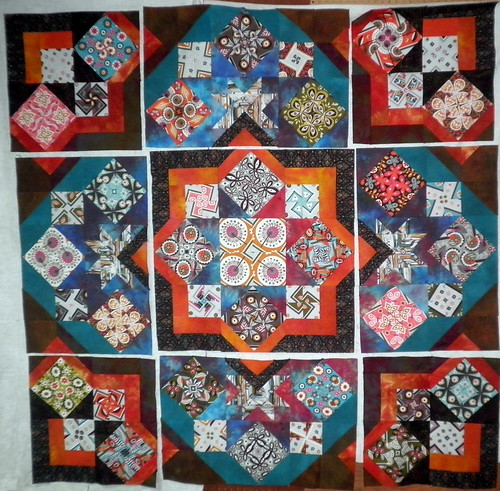 When I piece a top I try to piece my blocks into as many ‘chunks’ as possible. I like to avoid, long, straight stitching as much as possible. You can see above that I sewed all my blocks into 9 main chunks first.
 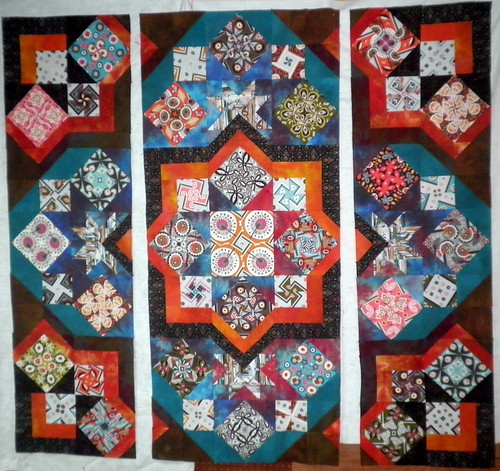 Then into three strips.
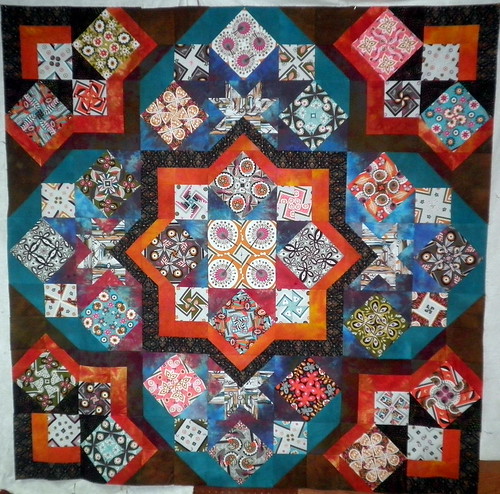
And finally it’s all together! I’m planning to give this top to Barb on Monday (at the Lodi Valley Quilt Guild Meeting where Judy Martin is coming to talk *SQUEAL!****) to take home and quilt for me. I can’t wait to see what she comes up with for it!
So – that’s it for now – what do you think? Would you have chosen differently in places? Has this made you want to come to the Quilt Retreat? If you’re already planning on coming – has it helped you figure out what to bring for fabric?
You can see more sample quilt tops and help choosing your fabric on Barb’s blog HERE.
Spinning Nines Tutorial – A New Block and A Pieced & Quilted Table Runner

Well – in my dreams I came up with a new ‘spin’ on the nine patch. Most of us quilter’s know how to make a Disappearing Nine Patch block by cutting the nine patch in half horizontally and vertically – well – what happens to a Nine Patch when you cut it in half diagonally – you get Spinning Nines!
Directions
Start by cutting out 1 set of 5 ‘dark’ fabrics and 4 ‘light’ or ‘medium’ fabrics into 3.5” strips WOF. Cut these strips in half. Pair up 12 of the strips – one dark to one light/medium and sew together. Iron towards the darker fabric. Add a dark fabric to the opposite side of the light strips on some and a light fabric to the opposite side of a dark strip on others. 
Once you have a general layout figured out take your nine patches off the wall. Here’s the ‘trick’ (not much of one).

I would recommend laying out all your triangles so you make sure you have opposite darks/lights. You can see in the picture above something is wonky with the top two blocks. When I stepped back and looked I saw it before I sewed everything together.
Sew them together back into a square. Square blocks down to 8.5”. 

I bound my final runner with the same diagonal print I used on some of my squares in my nine patch.
Final Table Runner Size: 16” x 32”
Please let me know if you have any questions about how to make your own Spinning Nine Blocks! I realize while I was putting this tutorial together I may need to take more pictures of my process. I have more patterns you can do with this block/technique coming soon so be sure to stop back!
Celebration - Kaleidoscoping


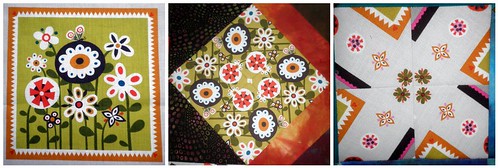


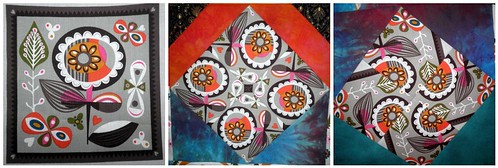
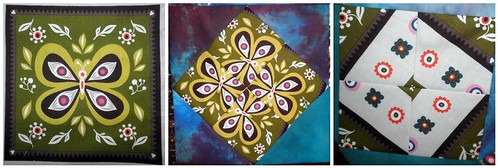


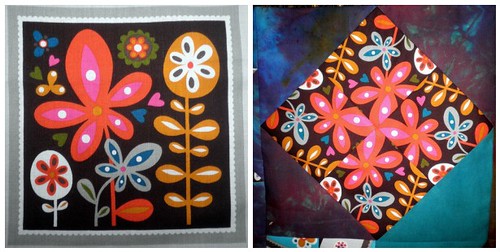
Not everything worked this well though…here is a strip of blocks I didn’t use:

I didn’t use the original block on the left. When I kaleidoscoped it it just wasn’t dramatic or impacting enough. I didn’t use the block second from the right because it reminding me too much of a swastika and I didn’t use the block farthest to the right just because it didn’t fit. But don’t worry – I will definitely be using this block somewhere – it’s just too cool!
I’m showing you these as a bit of a teaser…I have my quilt top finished! Stop back in a few days to see what it turned out like :)
Home Sweet Home – Happy Neighborhood Sashing Tutorial
Happy Neighborhood is basically the same as Suburbs but I’ll go through it anyways.
For this sashing, I also used the house print from Suzy Ultman’s Appleville Collection for Robert Kaufman. Any house with trees print fabric you have would work as long as they comfortably fit in the 3.5” x 12.5” sashing strip.
Cutting Instructions:
1 – 3.5” x 12.5” sashing strip
Directions:
BEFORE you cut our your houses (3) and trees (2), iron on your preferred fusible to the back of your fabric (I’m a Heat ‘n’ Bond girl personally). Once the fusible is on, THEN cut out your houses and trees(much easier than trying to add the fusible to the cut outs…)
 Arrange your houses and trees on your strip in a manner that is aesthetically pleasing to you. Iron on your houses and trees. If you used a light fusible be sure to add some appliqué stitches to hold those houses in place!
  I love this one too! And so simple!
 Here is the Happy Neighborhood Sashing between “House on the Bay” and “Under the Moreton Bay Fig” Blocks from the Home Sweet Home Quilt.
Home Sweet Home – Suburbs Sashing Tutorial

Cutting Instructions:
1 – 3.5” x 12.5” sashing strip
Directions:
BEFORE you cut our your house, iron on your preferred fusible to the back of your fabric (I’m a Heat ‘n’ Bond girl personally). Once the fusible is on, THEN cut out your houses (much easier than trying to add the fusible to the cut out houses…)
Arrange your houses on your strip in a manner that is aesthetically pleasing to you. Iron on your houses. If you used a light fusible be sure to add some appliqué stitches to hold those houses in place!
And it’s as easy as that – and doesn’t it look great!?
Here is my Suburbs Sashing between Marcia’s Crazee Patch House and The Happy Tree Blocks.
Home Sweet Home – Window Trees Sashing Tutorial
The next sashing I’m going to show you for your Home Sweet Home Quilt is very similar to the Window Panes Sashing with just a minor difference.
Fabric 1 (light): 2 – 1.5” squares, 2 – 1.5” x 3.5” rectangles
Fabric 2 (dark): 1 – 1.5” square
Fabric 3 (light): 2 – 1.5” squares, 2 – 1.5” x 3.5” rectangles
Fabric 4 (dark): 1 – 1.5” square
for the ‘trunk blocks’
Fabric 5 (trunk): 1 – 3.5” x 1.5” rectangle
Fabric 6 (grass): 2 – 3.5” x 1.5” rectangles
Fabric 7 (trunk): 1 – 3.5” x 1.5” rectangle
Fabric 8 (grass): 2 – 3.5” x 1.5” rectangles
Sewing Directions:

If you want more specific instructions check out the Window Panes Tutorial.
Step 2: For the Trunks, sew the 2 Fabric 6 rectangles to either side of the Fabric 5 rectangle. Iron towards the lighter of the two fabrics. Repeat with Fabrics 7 and 8.
Step 3. Sew the Window Trees to the tops of the trunks and then sew the two sets together. And Walla!

 Here’s the Window Trees Sashing between Block 10 – A Home for the Birds and Block 11 – Happy Tree
If my count is right – this is the 18th sashing of the 49 sashings…I’m about 37% of the way there :)
Blogger’s Quilt Festival – Time to Nominate and Vote
Once again Amy’s Creative Side hosted a HUGELY successful Blogger’s Quilt Festival with 621 Quilts on display from Blogger’s all over! I was happy to share with everyone my freshly finished Bloom Quilt (21). It is now time to nominate quilts for different categories and of course – vote for the viewer’s choice (ahem…Bloom is number 21)…
To cast your vote for your favorite go here: http://amyscreativeside.com/2012/05/18/bloggers-quilt-festival-spring-2012/
Blooming Poppy YoYo’s Lap Quilt
Here are the categories for nominations (only enter the number corresponding to the quilt via the festival – ie – my Bloom Quilt is 21 so I would put 21 in one or more of the categories…) :
- Favorite Baby Quilt
- Favorite Throw Quilt…hmmmm…21 would work in this category…
- Favorite Bed Quilt
- Favorite Group/Bee Quilt (note to self, be sure to have Home Sweet Home done in time for next years festival…)
- Favorite Two Color Quilt
- Favorite ROYGBIV (Color Wheel) Quilt
- Favorite Applique Quilt
- Favorite Pieced Quilt
- Favorite Hand Quilted Quilt
- Favorite Home Machine Quilted Quilt
- Favorite Professional Quilted Quilt
- Favorite Art Quilt – I would say 21 would work here too
- Favorite Doll/Mini Quilt
- Favorite Wall Hanging
Here’s the link to the nomination page: http://amyscreativeside.com/2012/05/23/quick-note/
Here are a few links to quilts that I checked out that really stuck in my mind…


There are so so so many more quilts that are amazing – I just wanted to show you a few of my personal fav’s. Thanks for all your support!
Sign Up for my Newsletter!
Project QUILTING on Facebook
PersimonDreams on Facebook
Popular Posts
-
I just have to say you all are so TALENTED! I'm in awe with ALL the projects submitted for this challenge! If it weren't for you (th...
-
I’m really excited to be a part of the Quilting Gallery’s big St. Patty’s Day Blog Hop Party. If this is your first time here I just want t...
-
Hi Everybody, There have been a few questions, so I thought I'd address them here. (Sorry I didn't jump in sooner here, but it's...
-
Today was Alchemy’s last full day with me. I thought I’d show her how to make a few rings and earrings like the ones I sell at TheApple . ...
-
Happy Monday everyone! I’ve been trying to find some time to sit down and put this post up for well over 24 hours now. The summertime, pr...


