Home Sweet Home Quilt Along
- Schedule
- Block 1 - My Home
- Block 2 - Lapacek's Orchard
- Block 3 - House by the Bay
- Block 4 - My Tilted House
- Block 5 - Two Trees
- Block 6 - Tree of Life
- Block 7 - Under the Moreton Bay Fig
- Block 8 - A Wonky Modern House
- Block 9 - Scrappy Trees
- Block 10 - A Home for the Birds
- Block 11 - The Happy Tree
- Block 12 - the little house
- Block 13 - Three Trees
- Block 14 - Under the Apple Tree
- Block 15 - A Home for Hoot
- Block 16 - Branch Sweet Branch
- BONUS - accuquilt home
- BONUS - Acid Cottage
- BONUS - Marcia's Crazee Patch House
- BONUS Block - Rippling Pond
- Flickr Group - Post your blocks here!
- BONUS - Acid Cottage
Project QUILTING
Feedback & Features
My Fabric is For Sale!
Kim's Crafty Apple
the Apple
Labels
My Flickr Stream!
My Blog List
-
-
2026 Crafty Goals2 weeks ago
-
-
Hemp Leaf Sashiko Table Runner7 months ago
-
2nd Annual Garver Pumpkin Party2 years ago
-
End of blog3 years ago
-
-
A Japanese Stash Buster Quilt6 years ago
-
Quilted Tassel Pouch Tutorial6 years ago
-
H2H Quilt Challenge 20196 years ago
-
Shuffling6 years ago
-
Quiltsy Cares 3/31/196 years ago
-
Eco-living On A Budget6 years ago
-
a new day dawns7 years ago
-
-
-
-
-
Hand Maker Blog Tour9 years ago
-
-
The San Salvador Sails By ...9 years ago
-
-
Gift of love9 years ago
-
-
New Updates Coming Soon10 years ago
-
Sweet Jenny Belle10 years ago
-
-
-
Winning Treasury #22011 years ago
-
Dianabol11 years ago
-
Dandelions11 years ago
-
A Quilty Finish12 years ago
-
A walk in the snow13 years ago
-
-
the harvest begins~13 years ago
-
-
My Blog Has Moved!13 years ago
-
Polka Dotted Dress Envy13 years ago
-
Come visit our new blog!13 years ago
-
Handmade Christmas Recap 214 years ago
-
-
Blech18 years ago
-
-
-
-
-
-
-
-
Favorite Websites
Kim's Crafty Apple has MOVED to www.PersimonDreams.com
I’m re-branding myself from Kim’s Crafty Apple into ‘Persimon Dreams.’
You can now find me at:
www.facebook.com/PersimonDreams
www.twitter.com/PersimonDreams
www.pinterest.com/PersimonDreams
(and my jewelry is still at www.theapple.etsy.com)
Easy Rhubarb Dessert – Market Fresh Recipe
The other day at my woman’s group the host made this delicious Rhubarb Dessert. I requested the recipe at once and was given permission to share it with you all as well.

EASY RHUBARB DESSERT
~Sue Karman
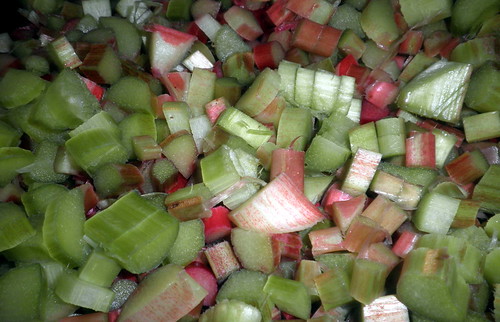 10 cup diced rhubarb (I found this growing wild by my fence line)
1 (3oz) pkg. strawberry jello
1 cup sugar
1 cup half & half (milk or water can replace the half & half if you prefer)
1 stick butter melted
1 yellow cake mix (dry)
1 cup oatmeal
In a 9x13" cake pan, layer rhubarb, jello, sugar, then cake mix. Pour Half& Half over
all. Sprinkle oatmeal evenly over the cake mix. Drizzle melted butter on top.

Bake 1 hour @350 My favorite way to serve this is warm with ice cream!!
Enjoy!
Block 8: 4 Wheeler – Modern Solids Patchwork Squared Quilt Along
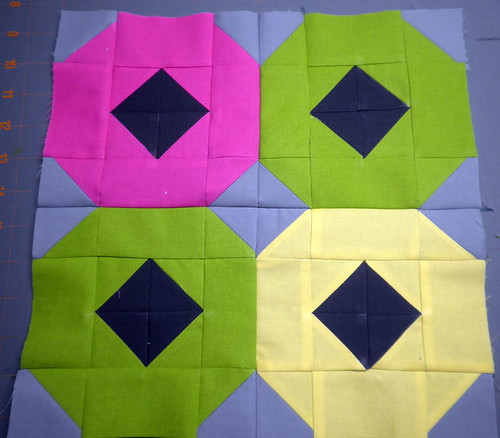 Here’s the 8th block for the Quilt Along – 4 Wheeler. I did modify this a little bit… Instead of using all teeny tiny squares I made a few rectangles. It really helped me make a more accurate block and I think the end effect is essentially the same.
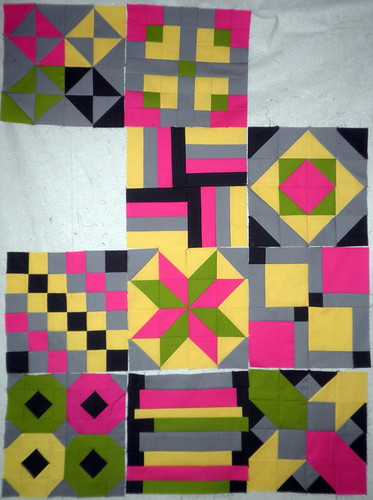
And here’s a photo of the blocks I have so far – just TWO left (and the sashing)!
A look back:
Spoonflower Fabric – Made from Quilts
One of the reasons I love to quilt is the beautiful fabric I get to use when I do it. Not only that – but once the quilt is done I essentially have a whole new gorgeous piece of fabric.
Lately I’ve been dreaming of designing my own fabric and the website www.Spoonflower.com has made this dream a possibility.
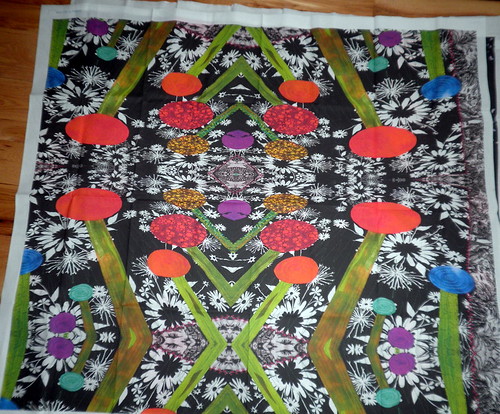
I’ve played around with the Bamboo my brother got me for my birthday but one of the newest things I’ve done is used the photo’s I’ve taken of my quilts and made them into fabric. I am LOVING what’s come out of this and I can’t wait to find some time to create some things with this yardage!
The photo’s I’m going to show you do not do the fabric justice – be sure to check out my Spoonflower site to see more true to life colors and you can even purchase some for yourself! Galaxies Converge
  Modern Poppies
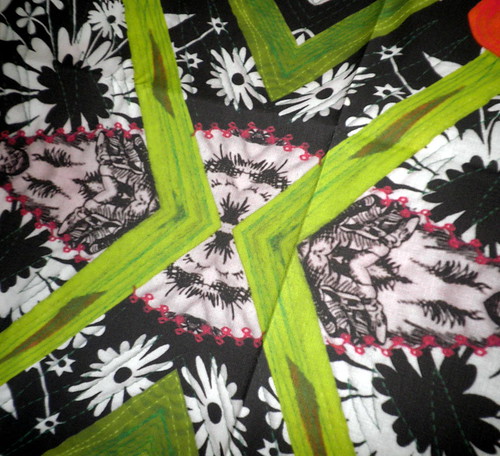 close up of Modern Poppies – I love how you can see the quilting details in the fabric!
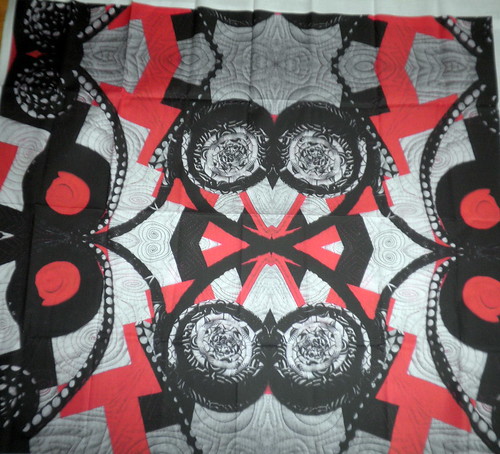 Swirls and Rectangles (I think a stuffed owl is going to be made from this one…)
  Zip City Quilt Print
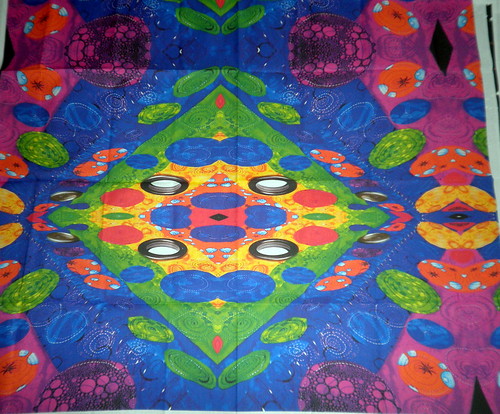

These next fabrics are made from photo’s I’ve taken of some of my jewelry…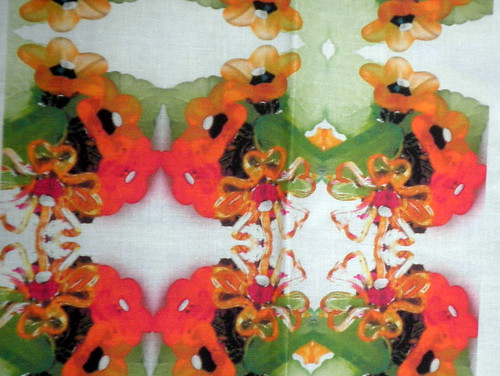

what do you think!?
Blogger’s Quilt Festival: Spring 2011 – Owl Be Yours
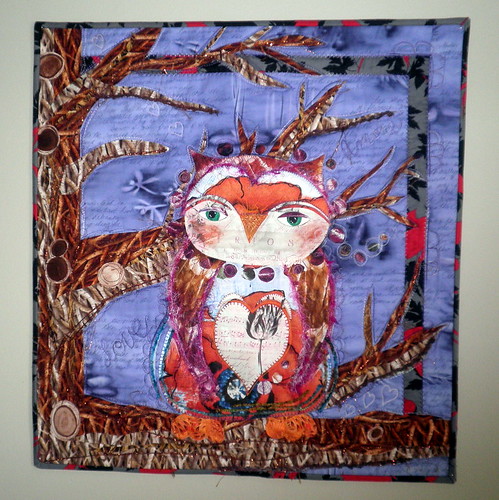
I actually have made lots of quilts in the last year so it was difficult for me to figure out exactly which one to share. I finally decided on my quilt, ‘Owl Be Yours’ that I created for the ‘Be My Valentine’ Project QUILTING Challenge. As I’m looking back on these post’s Amy was actually the guest judge for this challenge too – I hadn’t realized that when I decided that this would be my quilt for the festival!

The Story Behind the Quilt:
The day before this challenge was posted I had taken a class called - 'How to Paint an Owl' with Juliette Crane which turned out to be the perfect inspiration!
My piece is called 'Owl Be Yours'. Here’s a quick and dirty breakdown on how it all came together.
Step 1: Pieced the main background fabric AND the border strips.
Step 2: Fusing, Fusing Fusing! I fused all the branches and each separate piece of the owl onto the fabric.
Step 3: I then took a piece of fusible fleece and did the outline quilting of the owl. I cut it out for the 'trapunto' technique. ***FIRST time doing trapunto***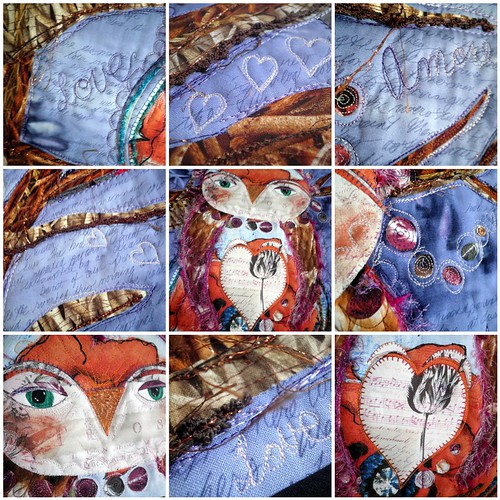
Step 4: Free Motion Quilting. I did LOTS and LOTS of free motion quilting on this piece. To create more texture in the branches, throughout the owl, I did an awkward, not perfect outline of the branches with variegated purple thread to create a 'windy' look, fun whimsical half circles all around the owl, feathers on the owls head and wings, hearts, the word's 'Love' and 'Amore' in the wind...the more you look...the more details you would see.
Step 5: What's a project without a little fiber? I appliquéd fun fiber onto the branches and the owl. The owl fiber was meant to give you the feeling of feathers and to create some distinction between the tree and the owl.
Step 6: Oil Pastels, I used some of my oil pastels to create some shine on the beak and the feathers. I also used some bronzer to give the owl some flushed cheeks.
Step 7: Three small white dots were painted in each pupil - to help make them look more realistic.
Did I mention - of course my owl is pregnant! (We just welcomed our new baby girl, Persimoni Mae, into this world about 3 weeks ago so it was fitting to have a prego owl in February)
Approximate Dimensions: 22.5" x 24"
There are a lot of ‘step by step’ photo’s on my flickr site. 
Don’t miss out on all the rest of the fun and amazing quilt entries in the Spring 2011 Blogger’s Quilt Festival!
If you love a challenge there’s an ‘off season’ Project QUILTING challenge going on right now. (Not a contest – just for fun)
Interview with AllThingsBelle for Season 2 of Project QUILTING
Happy Sunday everyone! I wanted to start out today with an interview with an amazing creative person that I’ve become friends with as a result of Project QUILTING – Jennifer of AllThingsBelle!
What made you decide to join Project QUILTING?
I really love craft challenges in general. I have been sewing for over 2 decades, but only in the last couple years have entered quilting. I thought this would be a fabulous way to learn more, to meet likeminded quilters, and expand my ideas of what “quilting” could be.
What was your favorite part about Project QUILTING?
I love to see the other quilts. I never enter with the desire to win per se. I do it for myself, so I truly enjoy seeing everyone’s work and interpretation.
Which Challenge in Season 2 was your favorite? and why…
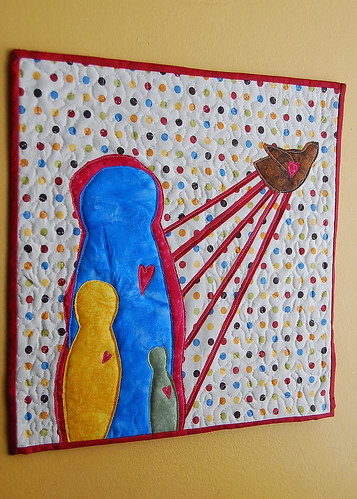 My favorite project was probably the valentine related one. I reached out and made my first quilt that spoke from my heart; I quilted about the loss of a pregnancy. It was both therapeutic and I loved my work all the more because it meant something personal to me.
 Which Challenge in Season 2 was your least favorite? and why…
I don’t have a least favorite challenge to be honest. There are some I struggled with more than others, but the struggles come from juggling my schedule and not having time to execute the quilt I imagined.
Which Challenges did you come up with your idea immediately and which took some marinating?
My valentine/loss quilt I had imagined as a painting in my head for months. I immediately knew that I wanted to make this a quilt once I saw the challenge.
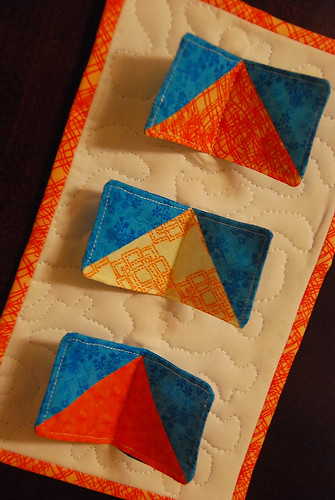
The flying geese took me awhile. I was only able to do a fraction of what I had imagined. Originally I wanted to do a very large piece, but time was an issue. In the end I had to change my vision at the last minute.
Did you try any new techniques for your projects during these challenges and if so, what were they?
Surprisingly I finally chain pieced. I was scared it would throw my machine off, but it worked great and I use that technique quite a bit now.
I had visible seams for my hardware challenge. That was a new thing for me.
How has Project QUILTING made you a better Quilter?
Absolutely. The judges never let my beginning binding skills slide, so I’m working hard at improving it. I also fell in love with batiks; I don’t know if that makes me *better*, but it did broaden my horizons.
What didn’t you like about Project QUILTING?
I could do without the competition. I do like constructive feedback, but I don’t need to place higher than my friends to enjoy the process.
Did you find the judges comments beneficial, annoying, or inconsequential? Why?
I appreciated all constructive criticism. However there were some notes I thought were just opinion and not helpful. We don’t all love the same type of art. It doesn’t make that art wrong, it just isn’t what you like.
Do you think the judging format should be more structured, less structured, stay the same? and why?
I would like to have the judging be public. I think it would be good to have it be in a Flickr group. It would allow there to be dialogue between artist and reviewer.
What was your favorite piece that you created for the Project QUILTING challenge?
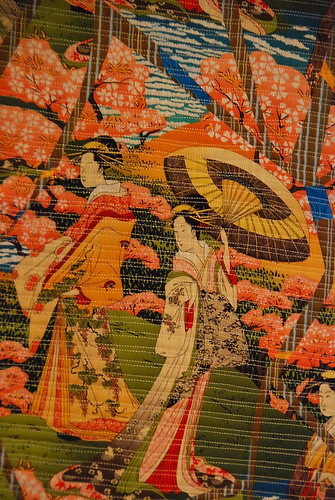
I love my Valentine piece and my final large print piece.
What were your top three favorite pieces that someone else created for the Project QUILTING challenge?
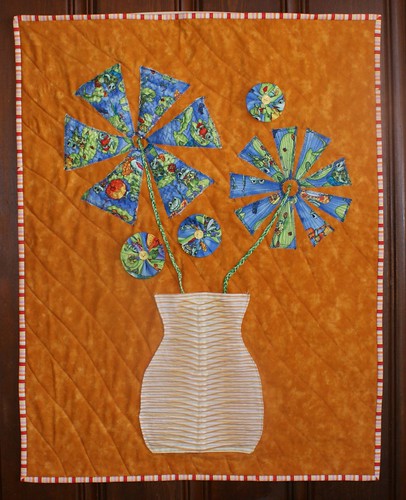
I loved Kathleen’s Froggy flowers
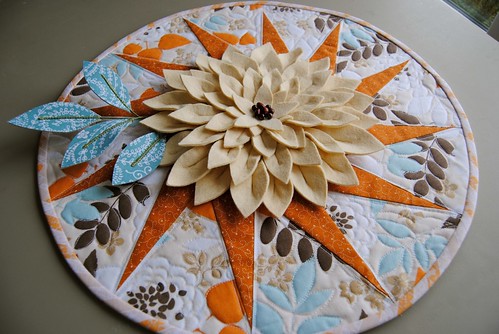
Quiltie's Mum Burst
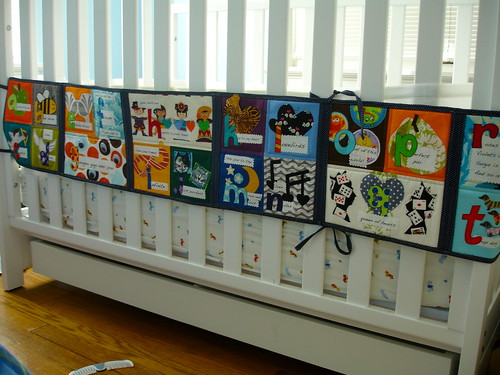 and Dashasel's Valentine ABC's
 What changes would you make to future Project QUILTING Seasons? More time for this busy mom would be fabulous! Maybe 2 weeks instead of 1?
Question from participants:
how does everyone find the time to make such beautiful pieces!?!?
LOL! I don't! That is why my pieces are much smaller and less intricate. I have a 6 mo & 3 year old, an Etsy shop, a blog I update daily, and tons of personal projects in the works.
I maybe get 3-4 hours to work on a PQ piece. I wish I had more time,but I do this for me and it provides great inspiration and I get to meet fabulous people!
Is there anything you’d like to add or comments you’d like to share with me and my readers?
JOIN! Even if you are brand spankin' new (like I was when it first started)...join! You will have fun and become a better quilter.. What more could you ask for?
To check out the latest Project QUILTING Off-Season Challenge check out: http://kimscraftyapple.blogspot.com/2011/05/off-season-project-quilting-challenge.html
And to see my beautiful new baby in one of AllThingsBelle’s hand knit cocoons click HERE.
Off Season Project QUILTING Challenge – Second Chance
Hello everyone! This second off-season challenge is actually coming from yours truly.
To read more about Project Quilting Here:http://kimscraftyapple.blogspot.com/2010/04/project-quilting.html and join the facebook group: www.facebook.com/projectquilting
Second Chance by WeirdGirlPhotography
For this challenge I’m giving you a ‘second chance’ at any of the challenges from the first and second season. I know many of you have said that if only you had more time you could have done something amazing – well, I’m giving you that. (and if you didn’t get a chance to do any of them – now you get to pick which challenge was most inspiring!).
Here are the challenges you can pick from:
- Shoofly
- Apple Blossoms
- Rectangles
- Road Trip
- Recycled!
- Log Cabin
- Stars Over America
- Office Supplies
- Black and White
- Nursery Rhymes
- Primary Colors
- What's In A Name?
- Be My Valentine
- Hardware Store
- Flying Geese
- Large Scale Print
THE RULES:
- Whatever the rules are in the challenge you choose to ‘re-do’ apply to how you should complete it for this challenge – EXCEPT you will get a month to complete your project.
- Have FUN! I’m doing this so you can really explore what you wanted to do in the past. Pick one that you really struggle with or one that completely inspired you. I can’t wait to see what you come up with!
- Please remember that these projects need to be created during the time frame of the challenge.
- If you need advice/tips/help (or you just want to give us all a sneak peak) with your project as you work on it feel free to post pictures to the flickr group: Project QUILTING WIP: http://www.flickr.com/groups/1430386@N24/
- POST your entries with a description of your creative process, including where you are (ie, I create in Madison, WI) and the size of your project by Sunday, June 12th, 2011, at noon, CDT, to this flickr group – Project QUILTING with KimsCraftyApple: http://www.flickr.com/groups/1401824@N21/ OR email a picture/description of your completed project to {lapaceksorchard at gmail dot com} with PROJECT QUILTING in the subject line (Yes, this time you have ONE MONTH!)
- Since we’re in ‘off season’ we aren’t having prizes/judges etc BUT if you do want people to truly critique (the good and the bad) your project post it to the Flickr Group: Project QUILTING – Critiques.
Orchard Blossoms
I just couldn’t resist sharing with you some of the pictures I took of the blossoms around my orchard.
 Beautiful pink plum blossoms.
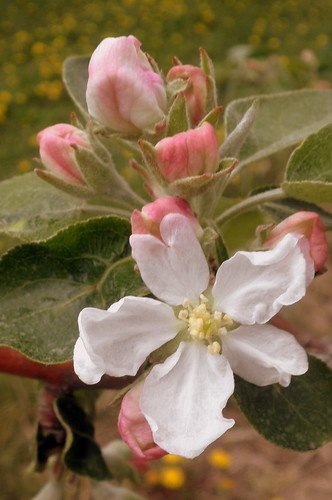 The first of our apple blossoms – I believe this is on a Zestar! tree.
  Stunning snowy white pear blossoms.
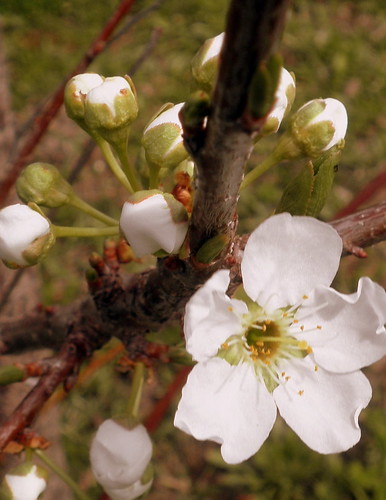 Plum blossoms (from last weekend).
And I realize this is not a apple blossom but I’m super excited that our very first tulips are blooming!
Block 7: Stacked – Patchwork Squared Modern Solids Quilt Along
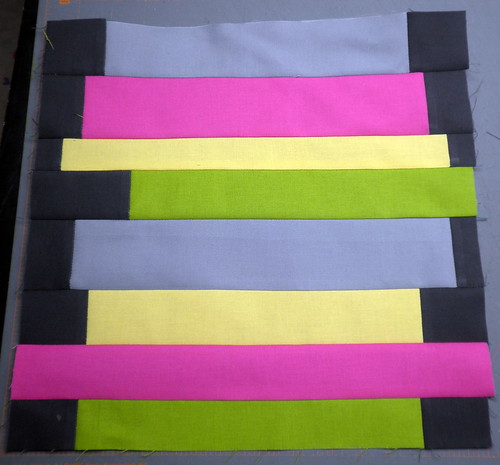 Here’s the 7th block: Stacked. I LOVE LOVE LOVE the look of this block. I do think there has to be an easier way to put these together quickly but I haven’t figured out what it is yet…
 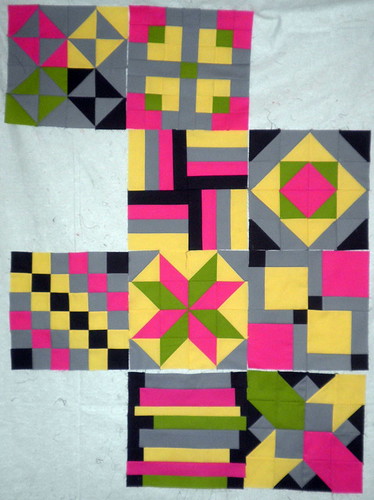 And here’s a photo of the blocks I have so far – just three left (and the sashing)!
A look back:
Project QUILTING – Off Season Challenge – It’s All in the Initials Projects

The first off season challenge, It’s All in Your Initials, is concluded and we had six fantastic entries. Since there is no official voting or judging this post is just to show off the great work the quilters did.
Quilter: UniquelyNancy
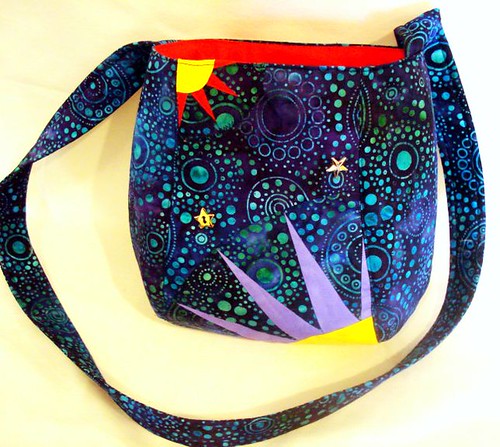
Starry Starry Night Shoulder Bag
I am from Warren Ct. and I have a hard time coming up with ideas for these challenges. This one came to me in a dream after looking at the colors I found to fit my initials, my initials being N.V.S.T.
I chose Navy, violet,Siren red and topaz yellow.
The navy print looks like a night sky so I chose that for the background and then used the remaining colors to make three New York Beauty blocks which I cut as the front and back panels for my bag. Then I dug through my many button boxes and found some metallic stars to add for more interest.
The bright red lining and the large interior pocket were then added and voila!
Quilter: Marcia’s Crafty Sewing and Quilting
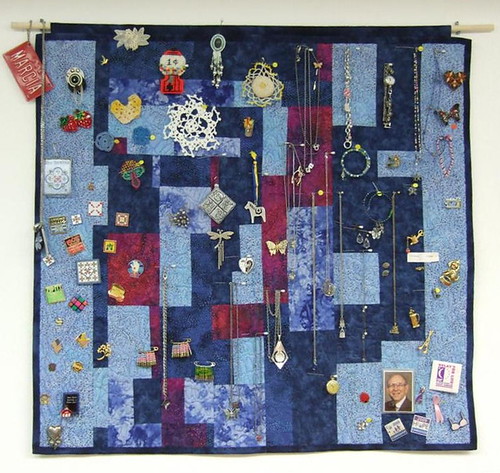
"Marcia's Tiny Treasures Quilt"
It's all in your Initials - Project Quilting
Marcia Wachuta Boscobel, Wisconsin
Marcia's Crafty Sewing and Quilting
Midnight Blue, Evening Blue and Wild Watermelon were my colors for MEW. I chose colors from the Crayola Crayon website. Using a variation of my Scattered Quilt Pattern, I constructed a small quilt. I quilted it with my name all over the quilt in a wavy design. You can see a video of the quilting at Work in Progress - The Quilting. The quilted wall hanging measures 30" X 32".
I attached the binding with an all machine embroidery binding and added a hanging sleeve on the top. I hung it on the wall behind my quilting machine, where I then added all my tiny treasures..... Pins from quilting events and pins from when I was a teacher. Pins from Relay for Life including a photo of my Dad who died of cancer in 1996. My Mom is currently battling cancer. I pinned up my tiny crocheted items that I made years ago. Then I added charms, pins, and necklaces from four generations of my family. They all have special meanings. As I was going thru' my treasures, I found the little beaded pins from the 90's! Can you see the American Flag and the Packer G? I decided to group the items, but I certainly could have just put them up in any order. What a delightful quilt project! The perfect spot for all the little memorabilia from the past. As I find more items, I will proudly display them on my quilted wall hanging.
Quilter: ForQuiltsSake

Celebrate Your Differences
Made by Pam Geisel of For Quilts Sake in Yellow Springs, Ohio, May 2011 for Project Quilting Off Season (Spring 2011), Challenge 1, It’s All In Your Initials
17” x 17”
My creative process and how I made it:
My initials are PKG so I used Purple, Green and Black. The purple and the green should be obvious, but why did I use black? My background is in graphic design and when designing something that will be printed in full-color, we use the color system CMYK which stands for cyan, magenta, yellow and black. I can only assume they used “K” for black because using “B” would make people think blue. So black really was the first color I thought of to use with my “K”.
I thought it would be fun to use some of the fabrics that I won from Project Quilting last season. One of my prizes was a set of Hoffman Bali Batik bundles. I got the Grasshopper collection which conveniently was mostly greens, blues and purples. I picked out some of the greens and purples and then added some green hand dyed fabric that I also won.
I came up with a design that used fabric in 2.5” strips since that’s how wide the batiks were. I decided to use the black fabric as squares going from one corner to the other diagonally, but I wanted to add something special to them so to be different, one of the diagonal squares is a green/purple batik instead of the black. I knew I wanted to keep the connection so I planned on outlining that square with black.
My original quilting idea was much different than I ended up using. Once everything was pieced, I got out my threads and while I did have several greens threads, I only had one spool of purple and it was variegated. I like using variegated thread but with a small project that will be quilted with a straight stitch, it’s hard to see the colors change. And I didn’t have a variegated green so I thought that might look a little odd for one to be variegated and the other not.
I then thought I might do some seed stitching with needlework floss but found that I didn’t have much green and didn’t seem to have any purple. Where has all my purple gone?
Back to idea number one but instead of stitch-in-the-ditch or some random curves going from one side to the other, I thought it might be nice to sew a quarter inch from the seam and use purple thread on the green pieces and green thread on the purple pieces, so I took the black thread off the sewing machine and started to put on the purple when I noticed how well the black thread showed up against the fabrics and I quickly threaded the black back into the machine and did the quilting.
I used my favorite facing technique for the binding and then got out my large supply of beads and yarns and ribbons to decide how I wanted to embellish this quilt. None of the yarn or ribbons felt right so on to the beads. I did have several green and purple beads but most of them got lost in the colors.
I just couldn’t decide how to use the green and purple beads so I stared sewing some black seed beads around the special square to outline it. And since the beads were sitting out on the quilt waiting to be sewn, I noticed some had rolled onto the black quilting lines. I really liked how they looked placed at random intervals, they were small so they didn’t overpower the piece, but they were large enough to be noticed.
Quilter: KimsCraftyApple
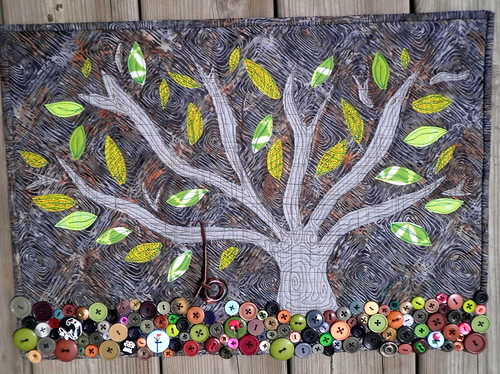
The Tree
My colors for this challenge were:
(K)ohl
(A)sh
(L)ime
I decided to try out a few different appliqué techniques - reverse and raw edge.
I layered my lighter gray fabric (ash) below the darker gray fabric (kohl) and basted them together. I then took my tree template and sewed along the edge of it. Using my sewing lines I carefully cut the kohl fabric off in the pattern of the tree. Once this was done I realized I wanted a few more little branches off the sides and I added those as well.
For the leaves I used different lime fabrics and fused them onto the fabric. Once all pieces of the tree were complete I had some fun free motion quilting it.
Once this was done I realized it needed more. I loved that the rules of the challenge allowed us to use other colors to embellish. I knew right away that I had to add a tire swing. My girls have had HOURS of fun on Grandma and Grandpa's so it is definitely a must. The next thing I decided to add was a button lawn. I know I could have used my machine to stitch these down but I decided to do it by hand - it kept me busy and my mind off the fact that my new baby was content in my belly.
Approximate Dimensions: 14" x 20"
Created by Kim Lapacek
Madison, WI
Quilter: AllThingsBelle
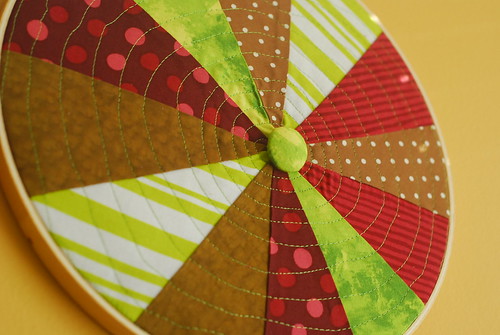
"Garden Party"
This is my entry for Project Quilting's Off Season #1.
Our challenge was to create a quilted piece with color names from our initials. I'm Jennifer Jacqueline Rodriguez.
J - Jalapeño
J - Java
R - Raspberry
For this project, I wanted to work on piecing. I had been eying the Sprocket pillow tutorial and thought it would be a great starting point. I had never pieced a circle before this. It was not super easy, but I'm pretty happy with the end result.
When I worked on this, I had just finished a different pillow and I wasn't really in the mood to make another. I thought this quilt top would be fabulous as modern expression as a flower. I made a matching fabric covered button for the flower center. I'm not huge on everything be symmetrical, so when I hooped it askew - I think it helps it look more flower-ish as well.
Quilter: Diane Lapacek

Pansy Fury
My initials are DML. I considered many color combos, but finally decided on daffodil, mango, lime. Wild!!! Not my usual range, but, hey, a challenge isn't supposed to be easy. I first thought of doing some kind of a bargello, then cutting it up and putting it back together to create a more interesting effect. That swam around in my head a bit then I thought, "Why not do it in a circle." So that's what I did. I flipped a few pieces to add interest, then cut the edges in curves instead of a circle because I thought it had the look of a pansy. I added an extra layer of mango in random spots, then went looking for a piece of lime green to appliqué it to. I couldn't find anything in my stash that suited me, so I dyed up a few pieces. I learned that it takes ALOT of yellow and a little blue to make a really great lime green.
I covered the raw edges of the appliqué with rickrack, DMC floss and other hand dyed and commercial fibers. I stitched the ends down, then twisted them all together and stitched them with a straight stitch. This allowed them to stay loose enough to give a 3D effect. Because these were embellishments, I added some gold and brown tones. I used two different combinations of fibers.
I added the squares and rectangles in the corner because I liked the contrast with the curves of the "pansy". Satin stitching added an additional design element. I added some mango bias tape to create a border effect.
I quilted the mango portion of the "flower' in lines from the center outward and the daffodil portion going around the circle. The background is a freehand fern effect and the "border" has a small pebble pattern. I left the squares and rectangles un-quilted.
The flower center was created by using "shreds" of hand dyed fabrics. Whenever I square up a piece of hand dyed fabric, I throw the "shreds" into a box. I took a few at a time and wrapped them around my fingers, then laid them flat and stitched through the center to tack them down. I fluffed them up and trimmed the wildest ends to create 3D loops that add great dimension. A lime stripe cut on the bias was used for the binding.
This is my first challenge. Up to now I've been a judge. I have always been amazed by the things the Project Quilting participants create in just one week. After completing this, my respect for all of you has only gone up. This is not easy. But it does feel great to finish a project I would never have envisioned without this challenge. And it was FUN. And I know it will make me a better quilter.
26" x 30".
Created by Diane Lapacek in Poynette, WI.
A new challenge will be posted this coming weekend – Stay TUNED!
Also, if any participants from Season 2 want to fill out their interviews and return them to me so I can post them I would LOVE it!
Here is a look back at the one’s I’ve posted so far:
Happy Mom’s Day!
I hope all the mom’s out there are having or had a fabulous day!


Block 6: Tail Spin – Patchwork Squared Modern Solids Quilt Along
Baby Pip came at just the right time for me to at least have a hope of keeping up with the Patchwork Squared Modern Solids Quilt Along. 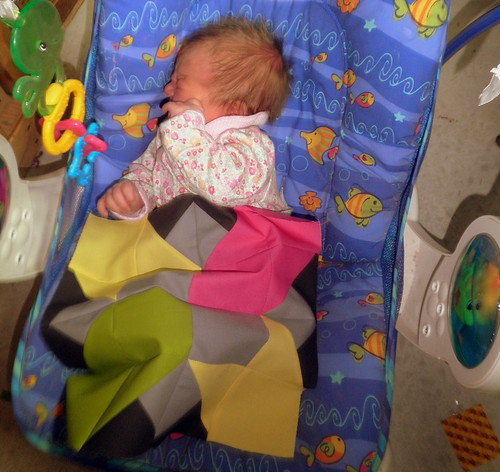 Yesterday, I put Pip in her swing and sewed Block 6: Tail Spin. She was happy until I got to the photo session part – I’m guessing the hum of the sewing machine calms her since that’s all I did pretty much for the last three months :)
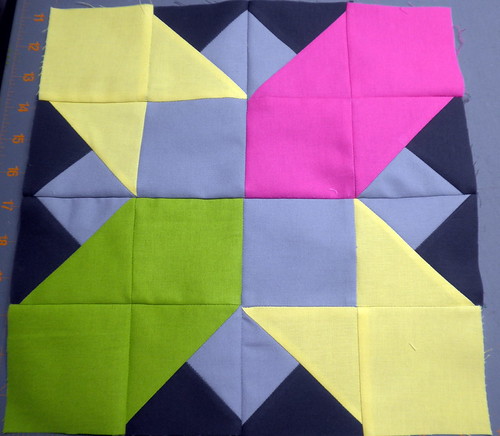 I tweaked it just slightly…I can’t seem to help myself…
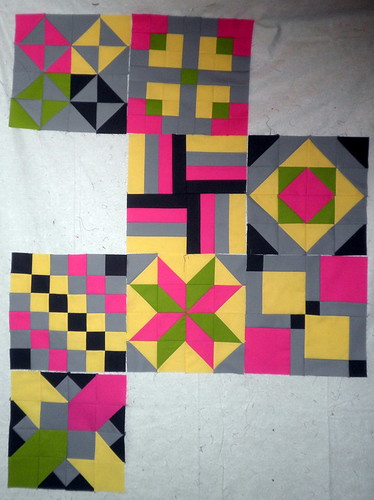
My blocks so far…
PS: WIP Wednesday posts will be put on hold for a bit – I’m sort of on ‘maternity leave’ so I don’t have much happening in the crafting arena. I did accomplish last weeks goal – Have Pip!
A Front Page Feature!

Thanks MalibuQuilts for including my ring in your beautiful treasury, Dark Romance.
Our New Little Bundle – Persimoni ‘Pip’ Mae


Sign Up for my Newsletter!
Project QUILTING on Facebook
PersimonDreams on Facebook
Blog Archive
-
▼
2011
(225)
-
▼
May
(14)
- Easy Rhubarb Dessert – Market Fresh Recipe
- Block 8: 4 Wheeler – Modern Solids Patchwork Squar...
- Spoonflower Fabric – Made from Quilts
- Blogger’s Quilt Festival: Spring 2011 – Owl Be Yours
- Interview with AllThingsBelle for Season 2 of Proj...
- Off Season Project QUILTING Challenge – Second Chance
- Orchard Blossoms
- Block 7: Stacked – Patchwork Squared Modern Solids...
- Project QUILTING – Off Season Challenge – It’s All...
- Happy Mom’s Day!
- Block 6: Tail Spin – Patchwork Squared Modern Soli...
- A Front Page Feature!
- Our New Little Bundle – Persimoni ‘Pip’ Mae
- Interview with Marcia’s Crafty Sewing and Quilting...
-
▼
May
(14)
Popular Posts
-
I’m really excited to be a part of the Quilting Gallery’s big St. Patty’s Day Blog Hop Party. If this is your first time here I just want t...
-
I just have to say you all are so TALENTED! I'm in awe with ALL the projects submitted for this challenge! If it weren't for you (th...
-
Hi Everybody, There have been a few questions, so I thought I'd address them here. (Sorry I didn't jump in sooner here, but it's...
-
WOW! WOW! WOW! I was absolutely blown away by the number of amazing entries that were submitted for the first challenge! You all made a ...
-
We’ve already gone through how to create the frame for the barn quilt , how to paint the barn quilt – now I’m going to show you the last ...


